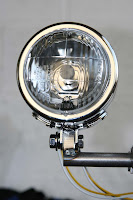
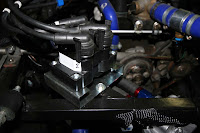
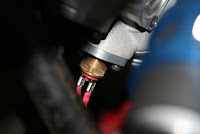
The Stack fuel gauge is fully programmable. You can connect whatever sensor and chose from different backlight colors for maximum, minimum or normal operation. The sensor is quite an old one but still works fine. Settings for the Stack fuel gauge are customized, min and max levels can be programmed individually.
Dash cabling is almost finished. The rest is for next year ... Happy New Year! See you in 2013!
Cheers.
Pages
Monday, December 31, 2012
Friday, December 28, 2012
Dash cabling
No scuttle yet means free access to the rear side of the dashboard. Switchwork of starter, horn, high beam and the oil pressure gauge with it's low pressure warning light are done.
It's a start and there is more to come. To test the cabling, I crimped some provisional terminals and connected them to the battery. Nothing is more frustrating then short circuits during installation, and with some good connectors and a little discipline, this can be evitated.
Cheers.
Wednesday, December 26, 2012
Fuel plumbing - done
The throttle bodies are of DHLA-type, which means two separate double housings. Today I cut the link for both fuel rails and inserted it. The housings are also mechanically linked to operate the throttle and I had to cut the lever to suit my installation. The right housing is at the front of the car where the fuel will enter the fuel rail. Throttle position sensor unmounted from the Dellortos and mounted to the Jenvey throttle bodies ... the principle remains the same, but the TPS has to be recalibrated with the Emerald ECU.
Fuel goes through the rails and is feeded to the injectors, excessive fuel comes out at the end of the rail and goes back to the swirl pot. In between there is the fuel pressure regulator that will be set to 3bar. The FPR is plumbed in and was the last item of a long list. Hopefully fuel plumbing is done now. The check list is rather long with a lot of connections from the tank to the injectors and back.
Cheers.
Tuesday, December 25, 2012
Fuel pressure regulator
Studs had all different lengths and were too long for the throttle bodies anyway, which took me an hour to measure, cut and mount them with some thread compound.
Fabricated a bracket to mount the fuel pressure regulator near the fuel rail and swirl pot. This gives a nice ensemble of everything around the fuel. And a good reason to try that bender I recently bought from a friend. The bracket is out of 5mm aluminium and is fixed between two chassis rails.
Cheers.
Monday, December 24, 2012
Injectors
There is no color code conspiration. Although I was after it and almost cracked the enigma, there is none. Maybe for some manufacturer, but even there you find remarks like "color may differ from picture" a.s.o. What you must know to identify an injector is the part-number and manufacturer, then you can search for the flow-rate, resistance and all relevant data. Unless somebody already made all the the work for you, like Stan Weiss for example. Have a look at his site here. I downloaded the list and made it available as a .pdf.
To get an approximate flow rate for a 4 cylinder engine, multiply the injector rate in cc/min by the number of injectors and then divide the answer by five. In this example: 272cc/min x 4 = 1088cc/min total available flow. Divide by five gives you 217.6 bhp. That is with the injector 100% flat out at a fuel pressure of 3 bar. Normally you aim for 80% of total duration making the 272 injectors worth about 175 bhp at 3 bar pressure for my engine. That would be a rather optimistic calculation and my engine will not achieve that amount of power. This is not an exact calculation because it doesn't take in account other parts of the engine responsible for the power output (camshaft, valves, pistons ...).
Oh, and yes, by the way ... mine are pink !
Cheers.
Goodbye carbs
... welcome injection!
Jenvey DHLA style throttle bodies + fuel rails + injectors, trial fit for measurements.
Jenvey DHLA style throttle bodies + fuel rails + injectors, trial fit for measurements.
New inlet manifold gasket is inside this kit from Burton. I mounted it with some silicon paste and also sealed the bolt in the middle which plugs a water gallery.
This throttle link commanded the Dellortos but should also be quite practical to link the throttle bodies with the throttle pedal. It's a bolt-on, so if this doesn't suit, I can take it of.
Cheers.
Wednesday, December 19, 2012
Engine runs
Some preparation work prior to first run after 14 months included the build of a launching device. This is the result and comprises a jerrycan, a battery, some switchwork (toggle for ignition, pump, ECU and charge, charging light, starter push-button) and an oil pressure gauge.
The diagram shows what is needed to start an engine. The sensors have to be connected to the ECU and the first start wasn't successfull due to an error in the crank sensor wiring. Polarity is relevant for that sensor and information is somehow spread over different documents, that's why I composed that little pic to collect all the info in one place.
After a lot of work, the engine finally runs and I was proud to call the kids and give some good kicks to the throttle so they can hear it over the phone.
Cheers.
Monday, December 17, 2012
Coolant fill
The new radiator also meant that most of the coolant was lost during the crash and the change. Without the scuttle where the nice aluminium expansion tank is fixed, I mounted the old one on top of the engine and filled the circuit via the thermostat housing. Once the liquid spills out of the small radiator port, it has to be closed, then the thermostat housing is filled to level and also closed. The expansion tank is then filled a little above minimum and closed. Time to look around the whole circuit for leaks. When the engine gets started and the coolant circuit is under pressure, there might appear some drops on connections and it will be fixed. For now it's good to know that the coolant is in again. One more step done before restart.
Cheers.
Cheers.
Saturday, December 15, 2012
Launch facility
A year and two months since the engine ran, some more preps done before I can push the button. Carbs are on again, HT (high tension) leads connect the ignition coils to the spark plugs, throttle pot newly calibrated.
Before converting to injection, I want to start the engine on carbs. The tank and fuel pipes have not been tested, neither the pumps. That's why I built this launch facility on a trolley. The switchboard has an ignition switch and a start button, the pump, filter and fuel pressure regulator are from the old installation. Once the engine coolant has been filled, the battery and switchboard get connected to the ECU and starter already installed in the car. This provisional starting solution permits to test if the engine runs and if the new oilpump builds enough pressure, after which I will check all the rest before mounting the throttle bodies.
Cheers.
Labels:
Carbs,
Fuel Injection,
Ignition
Tuesday, December 11, 2012
ECU alive
After more than a year without current, it was time to check the ECU. The newly acquired Windows7 tablet has the Emerald software installed, the driver for the serial-to-USB converter has been updated. The connection worked first try, although I couldn't check everything without a running engine. But one thing I know for sure now, the temp sensor showed only 5°C in the workshop and that's bloody cold!
Cheers.
Cheers.
Stack sensor loom
Loom #one is for everything sucking high currents.
Loom #two is for the sensors connected to the ECU.
The third loom shown here is for the sensors connected to the Stack gauges. More and more cables fill the engine bay and scuttle and will be linked during some more cabling sessions. With only 5°C in the workshop, it's not the ideal setting for such a job, but it has to be done.
Cheers.
Monday, December 3, 2012
Terminals
Connectors for crank signal, ignition coils, air temperature and throttle position.
Good stuff those AMP terminals, but a pita to have a nice harness. Strip the cable, coat it with tin, weld the pins, put the boot and braided sleeve over the cable, check the wiring diagram, put the pins into the terminal, pull on the boot, shrink the protective sleeve, done! Those four connectors took me two hours. As a reward it looks neat and professional!
Cheers.
Saturday, December 1, 2012
And there was light ...
We welded new brackets and mounted the headlamps this morning. The small 4" units look good on a small car like this.
Cheers.
Cheers.
Sunday, November 25, 2012
Wasted spark
Ignition in my car will be of wasted spark system. This means that both cylinders compressing and exhausting get a spark. In the cylinder compressing, the spark will detonate the mixture - in the cylinder exhausting, the spark has no effect (wasted!). Cylinders 1&4 and cylinders 2&3 are grouped and have separate coils. The picture shows the double coil and HT-leads with the according labels. Principle circuit diagram explains how ignition is triggered according to crank position. If you want to know more, this compendium is quite complete.
The coil has quite some weight and has to be secured with a bespoke bracket. I chose one of the front chassis rails as I want to route the HT(high tension)-cables from underneath the intake manifold.
Cheers.
Saturday, November 24, 2012
Sensors
A whole afternoon spent to locate all the sensors and connect some of them. Here we go:
Water t° sensors for Emerald (ECU) and Stack (dashboard), air t° sensor for ECU.
Oil t° and oil pressure sensors (old and new) for the Stack dials.
Crank position sensor and throttle position sensor (TPS), both for the ECU.
To avoid some of the cables coliding with the belt and drive pulley, I routed them through a small protective piece of aluminium tube. At the same time, this allows to have all the cabling on the same side of the engine.
Cheers.
Subscribe to:
Comments (Atom)


