One of many challenges "on top" will be the DIY aluminium cycle wings. Today I started to build a pattern. The models are the original Caterham PVC cycle wing and a very light carbon fibre alternative. I chose beech because it is quite hard. This will be important when I wrap the borders. I'm curious to learn how to do it, but will probably stop doing it if it is too time consuming.
Cheers.
Pages
Saturday, March 30, 2013
Rear numberplate
Looks easy, but if you want to have it in the middle and level, you have to spend some time doing it right. The licence plate light is a classic Hella item.
Cheers.
Cheers.
Thursday, March 28, 2013
Crank sensor
After two small runs, the car refused to start yesterday evening. There are rub marks that suggest that the crank sensor was mounted too close to the trigger wheel. I suspect this sensor to be the reason, because the red LED on the Emerald ECU doesn't turn green when cranking (it should when it has a crank signal). A quick look at the Emerald shop shows that they have Marelli crank sensors in stock. The bracket I made is for Ford sensors. I have to design a new rugged sensor bracket and check the sensor position to prevent this kind of trouble.
Cheers.
Cheers.
Wednesday, March 27, 2013
Front numberplate
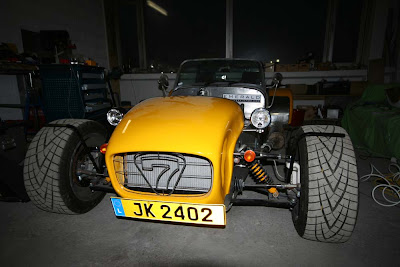
Not a lot done tonight 'cause car not starting, maybe a sensor issue ... i'll investigate when frustration has waned. Numberplate is on, though.
Cheers,
Cheers,
Tuesday, March 26, 2013
Happy feet
It's hard to imagine, but summer will come. One of the downsides of my car is the heat in the driver's footwell, especially with the big exhaust manifold I have mounted. When I made the new sidepanel, I left a hole in it to chase the hot air out of the car. Now it was time to build the heatshield susceptible to guide the hot air to the hole. So tinsnips out and cut some aly sheet, covered with heat reflective foil.
Fitted after cutting a hole for the steering shaft and bent to suit. Rear view shows how the heatshield should deviate hot air to the outside (hopefully).
Topview shows the whole manifold with the heatshield in place. I will report in summer if it works!
Cheers.
Fitted after cutting a hole for the steering shaft and bent to suit. Rear view shows how the heatshield should deviate hot air to the outside (hopefully).
Topview shows the whole manifold with the heatshield in place. I will report in summer if it works!
Cheers.
Fuel level sensors, HT lead holders, exhaust joiner
Some more small jobs to report, brake level sensors mounted and HT lead holders in place, exhaust joiner unmounted, cleaned and assembled with exhaust cement.
Cheers.
Cheers.
Sunday, March 24, 2013
Moving under own power
With the torque chart at hand, I put the car on its wheels and torqued the suspension bolts to 40Nm all around. Another job has been done with the help of my son Pit who cut large holes on the lathe to mount the brake fluid sensors on to the reservoirs.
Proud to drive it outside under its own power for the first time since the rebuild (18 months).
Cheers.
Proud to drive it outside under its own power for the first time since the rebuild (18 months).
Cheers.
Desperately seeking spring
Just imagine, you're ready for a first trial of your newly (re)build car and then ... SNOW !
Cheers.
Cheers.
Monday, March 18, 2013
New front bearings
When assembling the new wheel hub and bearing, I wasn't happy with the amount of grease they had put in the factory. So off again for some good greasing! While I'm at it, I folded the retaining brackets to secure the disc bolts (pics show before and after, look near the bolt heads).
Taking of the hub gives a different view of the speed sensor and further explains how it can count the disc bolts. But after all those nice pictures, you have to get dirty and reach for the big grease pot.
The crown nut is used to set the bearing. Not too tight because the heat will expand the bearing and it can seize. The securing pin is folded to both sides.
Use brake cleaner to clean all the parts from excessive grease or other gunk. And now have a look at that grease cap. No new grease cap supplied so I had to use the old one. Well, it had a life before and you can see it!
Cheers.
Labels:
bearing,
Brake,
Speed Sensor
Wednesday, March 13, 2013
As the book says
Front MC with clevis, than bias bar and second clevis.
Rear MC bolted onto clevis.
Cheers.
Sunday, March 10, 2013
Small jobs Sunday
Waiting for the brake parts to be delivered gives time for small jobs. A panel joining the nose and the lower chassis rail was missing, out again with the panel tools! Another job was mounting the air temperature sensor inside the airfilter housing.
Rivnuts and Allen bolts to keep the battery cover in place.
Cheers.
Saturday, March 9, 2013
Brake circuit - design start
Not as easy as expected. Bolt on the pedal box, bleed the brakes and off we go? Naaaah ... Some more parts ordered at rallynuts.com.
List:
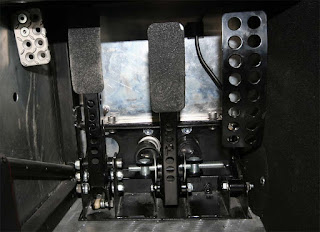
A bigger master cylinder sized 0.750". I expect the pedal not hitting the bulkhead after fitting it.
A new bias bar. I modified the first one for a rigid setup. That was an error! It doesn't work.
A bias valve. If the rear circuit still gets too much pressure, I can set it to lower figures.
I have to admit, when changing the hanging pedals to a floor mounted pedalbox with bias bar and two separate master cylinders, I hadn't learned enough about the brake system to properly design it. Now that I have learned how things work, I want to do it right. I also started to write a complete design report to be published once the circuit completed and ... working!
Cheers.
Monday, March 4, 2013
Brakes - more work to come
After fitting the brake master cylinders and bleeding the air, it appears that the rear MC is way too hard and the front a little bit too soft. With diameters of 0.625 at the front and 0.7 at the rear, the values are quite common but apparently don't suit my set-up. I will have to look for information and calculate the whole thing before ordering one (or two) other MC's.
Bleeding the old-fashioned way ... still what I prefer. Old school.
Cheers.
Bleeding the old-fashioned way ... still what I prefer. Old school.
Cheers.
Subscribe to:
Comments (Atom)


